

First of all, you need the "parabola" shaped dish, which is conveniently present in that stainless steel skimming spider on the right. Next, you'll 
And you'll need a piece of small plastic pipe (PVC) or some garden hose to insulate the adapter and the extension wire from being damaged or slipping loose from where you want it to be.
Last but not least, you'll need a mathematic equasion! Don't run away yet, it's really easy. Just 3 easy steps:
1. Find the diameter in milimeters and multiply that number by itself (Diameter 
2. Now you find the depth from the rim of the bowl, to the lowest point in the bowl (In a straight line from the center to the center). Let's just say it's about 32mm deep. Then multiply that by 16. Ex: 32x16 = 512
3. Finally, divide the answer from step 1, by the answer in step 2.
Ex: 16384/512 = 32mm
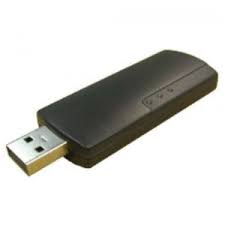
Now, that means the signals will be focused 32 milimeters out from the center of the dish... So you want your USB Wi-Fi adapter's reciever to be in that general area (the closer the better). Here's a link incase you really wanna get technical about the "Focus" of the dish.
You can always turn on some kind of Live Wi-Fi signal monitoring app and make minor adjustments until it's as good as it's gonna get.
Finally, you don't have to go with just a cooking utensil, that's just a general idea to show you how wide the spectrum is. The best would be something solid, or a mesh with closer weaving... Because the holes aren't actually the key, just the dish shape. The bigger the better, too. Here's an idea for you if you want something REALLY GOOD: Aluminum WOK LID. LOL! Or, a metal mixing bowl. Anything metal with that particular shape, as long as you use tha
Showing posts with label Tutorials. Show all posts
Showing posts with label Tutorials. Show all posts
DO NOT CONNECT YOUR GAMEPAD/JOYSTICK YET!
First of all, we need to actually install the software to manage your controller.
1. Open Terminal and type (enter your root password when prompted):
sudo apt-get install joystick
2. With the terminal still open, type:
sudo apt-get install jscalibrator
This one will actually show up as an application in your accessories menu. You can use this to calibrate and test your gamepad to make sure everything is working.
3. NOW You can plug in your Gamepad/Joystick.
4. Next, type this into the Terminal:
sudo chmod 666 /dev/input/js0
For each additional controller, change "js0" to js1, js2, and so on.
That last command changes permissions for the controller so you can use it.
Now that your gamepad is "working" most likely only your actual "buttons" will register a keypress, but not the axis, and if you're trying to play an emulator or anything without real linux gamepad support (almost everything) you'll need this next app to map keyboard keys to the gamepad buttons:
QJoypad
1. First of all, if you go to the main site of QJoypad you'll notice there are no Ubuntu binaries... And trust me, the Debian package wont work. So here is a special Ubuntu 32-bit version I found and it works 100% with no hassle:
QJoypad Ubuntu 32-bit
I uploaded that to MediaFire and I forgot who it was that made it... But pretty much all you have to do is use "Alien" on the .rpm package to make this one. But you wont have to because I have it all done and ready to go.
2. You'll notice there is no launcher/shortcut anywhere... This is a little pain but it's fine.
- Go to: System > Preferences > Main Menu
- Pick a menu you want the launcher to be in, in my case, I picked accessories.
- Push the "New Item" button.
- Enter "QJoypad" in the name field.
- type in "qjoypad" where it says command.
- Click that button in the top-left with that springy launcher icon.
- Click the "Browse" button.
- Now start by picking "File System" in the left menu.
- Go to: usr > share > pixmaps > qjoypad
- You wont see anything in the window, just push "Open" in the bottom left.
- Now you see a few icons, pick one and push "OK"
- Now push "OK" and go find your new launcher in accessories (or wherever you put yours)
When this app opens, it's in the tray. Single click the tray icon to open the main dialog.
Now, if your gamepad is still connected from the first time you connected it, when you push buttons, you'll notice the buttons being highlighted blue to tell you what you're pushing.
NOTE: If your axis' don't highlight when you push them, you will have to right click on the QJoypad tray icon and push quit, then disconnect and reconnect your gamepad again.
When you open QJoypad again, the axis' should highlight when you push them.
Now have fun assigning keyboard keys to your gamepad/joystick buttons and axis' and play all those emulators and games!
Subscribe to:
Posts (Atom)
